Resetting Your Premiere Pro Layout


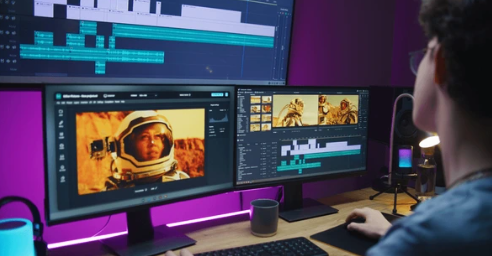
Adobe Premiere Pro, a powerhouse video editing software, allows you to personalize your workspace for maximum efficiency. From crafting custom keyboard shortcuts to configuring workspaces with specific panel arrangements, you can tailor the program to suit your editing style. However, these customizations might accumulate over time, leading to a cluttered or inefficient layout. Additionally, glitches or unexpected behavior can sometimes necessitate a clean slate.
This comprehensive guide will equip you with the knowledge to effectively reset your Premiere Pro layout, ensuring a fresh and optimized editing environment.
Understanding What Gets Reset
Before diving into the process, it's crucial to comprehend what resetting the layout entails:
- Workspaces: Any custom workspaces you've designed will disappear, reverting to the default layout.
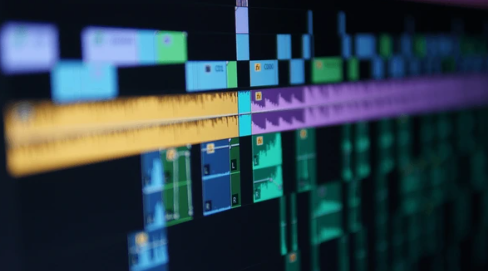
- Panel Positions: The arrangement of panels within your workspace (e.g., Timeline, Effects, Project) will be reset to their default locations.
- Window Sizes: Resized panels will return to their default sizes.
- Docked vs. Floating Panels: Any docked panels will be detached and become floating windows.
Important to Note: Resetting the layout will not affect your project files, media, or rendered exports. These remain untouched and can be accessed as usual after the reset.
When to Consider a Reset
Here are some scenarios where resetting your layout might be beneficial:
- Troubleshooting Glitches: If Premiere Pro exhibits unusual behavior, resetting the layout can sometimes resolve issues caused by conflicting configurations or corrupted preferences.
- Enhancing Efficiency: Over time, your workspace might become cluttered or inefficient. A reset provides a clean slate to rebuild your workflow from scratch.
- Starting Fresh: Perhaps you're switching to a new editing style or collaborating with someone who uses the default settings. Resetting ensures everyone is on the same page.
Methods for Resetting the Layout: Two Options
There are two primary methods to reset your Premiere Pro layout, depending on your operating system:
Method 1: Using the Keyboard Shortcut (Windows & Mac)
This method offers a quick and convenient way to reset the layout:
- Quit Premiere Pro: Ensure Premiere Pro is completely closed before proceeding.
- Hold the Option/Alt Key: On your keyboard, press and hold the Option key (Mac) or Alt key (Windows).
- Launch Premiere Pro: While holding the designated key, click on the Premiere Pro icon to launch the program.
- Confirmation Dialog: A pop-up window will appear, asking you to confirm if you want to reset your preferences. Click OK.
Method 2: Manual Deletion (Advanced Users)
This method involves navigating system folders and is recommended for advanced users comfortable with file management.
Disclaimer: Improperly deleting files can cause issues with Premiere Pro. If you're unsure, consider using the keyboard shortcut method (Method 1).
- Close Premiere Pro: Make sure Premiere Pro is not running.
- Locate Preferences Folder: The location of the preferences folder will vary depending on your operating system:
- Windows:
- Go to *C:\Users<Your Username>\AppData\Roaming\Adobe\Premiere Pro<Version Number>* (Replace
<Your Username>and<Version Number>with your actual details).
- Go to *C:\Users<Your Username>\AppData\Roaming\Adobe\Premiere Pro<Version Number>* (Replace
- Mac:
- Open Finder.
- Go to *Library > Preferences > Adobe Premiere Pro<Version Number>* (This folder might be hidden. To access it, press Command + Shift + G and enter the path in the search bar).
- Windows:
- Delete the Folder: Drag the entire Premiere Pro preferences folder to your trash bin.
- Relaunch Premiere Pro: Launch Premiere Pro again. This will automatically create a new preferences folder with default settings.
Restoring Preferences (Optional):
If you decide you miss your old customizations, you can potentially restore them by:
- Quit Premiere Pro.
- Locate the New Preferences Folder: Follow the steps mentioned above (Method 2) to find the newly created preferences folder after the reset.
- Close Premiere Pro: Quit Premiere Pro again.
- Locate the Old Preferences Folder: Navigate to a backup location where you might have saved your old preferences folder before resetting.
- Replace the New Folder: Replace the newly created preferences folder with your old backup.
- Relaunch Premiere Pro: Launch Premiere Pro. It should now use your old configurations.
Important Note: Restoring preferences from a backup might not work flawlessly, especially if there have been significant changes between Premiere Pro versions.
Rebuilding Your Premiere Pro Environment (After Reset)
Once you've reset your layout, Premiere Pro will launch with its default settings. Here's how to effectively rebuild your editing environment for a smooth and efficient workflow:
1. Choosing the Right Workspace:
- Go to Window > Workspaces.
- Premiere Pro offers a variety of pre-configured workspaces like Editing, Color, Audio, and Effects. Choose the one that best suits your typical editing style.
- You can further customize the default workspace by dragging panels around to your preferred positions.
2. Saving Your Custom Workspace:
- Once you've arranged the panels to your liking, click on the three horizontal lines (hamburger menu) in the top right corner of the workspace tab.
- Select Save As Workspace.
- Give your custom workspace a descriptive name for easy identification in the future.
3. Reassigning Keyboard Shortcuts (Optional):
- Go to Edit > Keyboard Shortcuts.
- Premiere Pro offers a vast library of default keyboard shortcuts for various editing functions. You can explore them or customize them further based on your preferences.
- Click on an existing shortcut and press your desired key combination to re-assign it.
4. Exploring Hidden Gems (Optional):
- The default workspace might have some hidden panels or features you weren't previously aware of. Take some time to explore the panels and menus to discover functionalities that might streamline your workflow.
Tips for an Efficient Rebuild:
- Focus on Essentials First: Don't overwhelm yourself by trying to replicate everything at once. Start by recreating the most essential customizations you use regularly.
- Take Advantage of Defaults: Explore the default settings and workspaces offered by Premiere Pro. They might be surprisingly efficient and well-designed.
- Gradual Customization: Build your customizations incrementally as you use the program and discover your workflow needs.
Additional Considerations:
- Third-Party Add-Ons: If you use third-party plugins for Premiere Pro, make sure they are compatible with your current version after the reset. You might need to reinstall or update them.
- Sync Settings Across Devices (if applicable): If you use Premiere Pro on multiple devices, consider using Adobe Sync Settings to keep your configurations consistent across machines.
By following these steps and tips, you can effectively reset your preferences in Premiere Pro and rebuild your editing environment for a smooth and efficient workflow. Remember, resetting preferences is a great way to troubleshoot issues or start fresh, but it's always a good practice to back up your custom settings before proceeding.